Search This Blog

Monday, July 9, 2012

Flatbread Three Ways


Flatbread Three Ways

To start, I apologize for not updating more often as of late but it’s been HOT! While that may seem like an odd reason for not blogging, allow me to explain. My kitchen and stove and beloved oven have been off-limits by order of the man of the house. Since the air conditioner has been running full-stop for nearly a week, adding any extra heat to the inside of the house has been a bad idea. So dinners lately have been confined to cold things and things that can be prepared with minimal actual cooking. I did, however sneak a bit of kitchen wizardry into the evening the other day. Quick-rising, and quick cooking, it was easy and most importantly, delicious.
A simple yeast dough is the base for this recipe, and it has multiple applications for the creative kitchen-er. I make two types of flatbread with this one single recipe, as the dough is divided into two balls. The first was an olive oil, sea salt, and rosemary. The second was olive, onion, and anchovy. Tonight I will make pizzas with the same method and I imagine they will be just as delicious. So here is the easy dough recipe, followed by the two variations I used this week.

3 ¾ c. flour
1 packet instant yeast
1 Tbsp. sugar
1 Tbsp. salt
1 ¼ c. warm water
2 Tbsp. olive oil

In food processor, combine dry ingredients and pulse to combine. Add water slowly with olive oil and pulse until it forms a sticky dough. Flour a board or countertop and transfer the dough, kneading for only a minute or two until it is smooth and elastic. Place dough in an oiled bowl and cover with saran wrap or a kitchen towel. Let dough rise in a warm place for about 1 ½ hours until double in size and very spongy.
Turn dough out again on floured surface and knead lightly. Divide in half, dusting with flour if too sticky. Cover again for 10 minutes and let rise.

Then you are ready to work with the dough and do anything you want with it! I think it would make a fine traditional white bread if left as one ball instead of dividing in two. But here is how I did it.
Place one ball of dough on a baking stone or sheet, making sure it is floured enough to work with without sticking to everything. Press it flat with your fingertips, working from the center outward, pushing and stretching it to the edges of the pan. Make it as thin as you wish, but try not to puncture the dough. I like my flatbread with a little thickness to it, so I left it at about half an inch thick. Cover the flattened dough with a damp kitchen towel and let rest for 15 minutes.
Preheat your oven to 450 degrees and make sure the rack in in the lower half. Make dimples in the dough with your fingertips. Brush with olive oil and add toppings. Bake until golden brown about 15 – 18 minutes. Cut and serve!
So that's the basic... now for the two variations...
Now the toppings:
Chopped fresh rosemary, about 1 ½ Tbsp.
1 Tbsp finely chopped red onion
A sprinkling of sea salt.

And the other:
1 onion, sliced thin and sautéed in butter until soft and golden
8 black or kalamata olives, chopped
2 anchovies, minced.
You are welcome to omit the anchovies if you do not like them, I think maybe next time I will omit them. It made for a very salty flatbread. Savory and delicious, yes, but quite salty. In place of the anchovies, use a sprinkling of sea salt or maybe some chopped capers.

The other use for this recipe is a pillowy soft pizza dough. My favorite pizza is what my husband calls “F---load of Goodness.” While everyone’s tastes in pizza differs, and you of course may top it with whatever you want to, here is my suggestion:

Garden Fresh Summer Pizza:
Olive oil
¼ c. store-bought alfredo sauce
2 cloves of garlic, minced, or garlic-pressed
1 bag shredded mozzarella
1 bag baby spinach, torn into small bits
1 tomato, finely chopped
½ red onion cut into thin slivers
6 mushrooms thinly sliced.
½ red yellow or orange pepper (or use a combination!) chopped
1 small sprig fresh rosemary
1 sprig fresh oregano
Dash cayenne pepper
Grated parmesan cheese

Brush dough with olive oil and spread with chopped garlic. Bake for 5-7 minutes, until just set, but not beginning to brown. The dough will absorb the oil, this is good. Spread with alfredo sauce and cover with chopped veggies, cheeses, and chopped fresh herbs. (You know how to make a pizza, I don’t need to instruct that). Dust very lightly with cayenne pepper, trust me, it makes a big difference. Bake another 12-15 minutes, until crust is brown and cheese is melted. Enjoy!

Sunday, June 17, 2012

Picnic Broccoli Cole Slawad

Broccoli Cole Slaw
Here is a quick-fix recipe that I have had in my arsenal for quite a while.  Sadly I can't claim the credit for this one, but I also don't recall where I first got it from.  This is GREAT for a BBQ cookout picnic weekend side dish. It takes only minutes to pull together and since it doesn't use mayonnaise it can sit out on a table for quite some time without fear of salmonella or other icky buggies. Since summer is the time for outdoor eating, having foods that are safe at room temperature is a big deal.  Lukewarm hotdogs are acceptable, lukewarm three bean or potato salad is not.  My big pet peeve is having to spend hours preparing food, so when we have people over and are cooking out, simplicity is king.
Chopped fruit, simple salads and slaws, chips, fresh salsa, maybe a cake.  (Oh speaking of which, I call this dish a 'slawad' because it's kind of an amalgam of cole slaw and salad) So this one is usually enjoyed by all and is gone in a flash. Enjoy!

2 bags (3-ounce) Ramen Noodle Soup in Oriental (other flavors will work too)
3/4 stick butter
1/4 cup slivered almonds
2 bags (12-ounce) bags broccoli cole slaw (in the bagged salad section of the grocery store)
1/4 cup sunflower seeds
Chopped green onions, for garnish
A handful of raisins

Dressing Mix:
3/4 cup canola oil
1/4 cup brown or white sugar
1/4 cup apple cider vinegar
1 ramen noodle seasoning packet

Put the ramen noodles in a bag and crush them with a rolling pin while melting butter in a large skillet over low/medium heat. Add the crushed noodles and slivered almonds to the skillet and saute, stirring occasionally (keep temperature at low/medium heat). Meanwhile, whisk together all the dressing ingredients in a small bowl. Place the shredded broccoli into bowl and toss with the noodles, almonds, and sunflower seeds. Pour dressing over salad and toss to coat.  Garnish with chopped green onions and raisins.

Tuesday, June 5, 2012

Check it out Chicken Enchiladas


Check it out Chicken Enchiladas
I do like ethnic food. In fact, I don’t think I have met a food culture that I do not like.  We just had our first anniversary a few days ago and celebrated by going out for Indian food at our favorite place.  Indian food is one of my all-time favorites.  It is earthy and warm and filling with complex flavors and spices. It is also something I have not yet fully conquered in my own kitchen (though I plan to soon!)  But Mexican food is a usual go-to in our house, though enchiladas are usually time consuming and finicky. I simplified things and with a quick trip to the store (and about 11$ total) I had the fixins.  Truthfully, this came out better than I had hoped.  Even my husband, who usually hates chicken, told me that “the Mexicans would be proud.” This dish, in this quantity, would serve about 4 people. I would have (in an ideal situation) served rice and maybe a salad with this.  But things being as they are, I simply buttered a couple slices of French bread and called it dinner.  You are welcome to add more or less spice to this recipe as you see fit.  I am a spicy wuss, but he likes the hot so we compromise on a medium heat in most of our dishes. I would say that the way I prepared this dish it was about medium heat.  You can use mild sauce, mild salsa, omit pepper.  Or conversely, you can add chilies, hot sauce, or buy hotter salsa and enchilada sauce if you like the tongue-burn.   So here goes nothing.

2 chicken breasts, cut into thin strips
1 packet fajita seasoning
1 can Ro-Tel
1 can traditional red enchilada sauce
Salsa (6 or 7 tablespoons)
6 small soft tortillas, flour or corn, but corn works better
Cheese, and kind, any amount you like (more the better, if you ask me, I used queso fresco and shredded cheddar.)
Sour cream for serving

Sprinkle chicken liberally with fajita seasoning and brown in a skillet with a tablespoon or two of oil and a couple shakes of black pepper.
Set cooked chicken aside or, if you like (and you have time) shred it.
Combine can of Ro-Tel and can of enchilada sauce in a bowl and stir well.
Lay out one tortilla at a time and fill with cheese, chicken, and a spoonful of salsa. (see picture)
Roll tightly and lay seam side down in a baking dish.  Repeat.
Pour sauce and Ro-Tel over rolled tortillas. Top with crumbled or shredded cheese.
Bake at 375 for 35-45 minutes until bubbly.
Remove from oven and let sit for 5 minutes before serving.
Serve with more shredded cheese and sour cream.
 laying out the ingredients on the tortilla for more easy rolling. from bottom to top, chicken, cheese, salsa
 laying rolled tortillas in baking dish seam side down
 pre-bake
 post-bake. MMMMMMMMM

Shut up and eat it Tuna Casserole.

Sorry I've been so absent for a while.  I actually wrote this post about 3 weeks ago and have neglected to post it so, here we go with the older one.


Shut up and eat it Tuna Casserole.

As some of you may know (those who know me well) things have been a bit hairy in our lives the past few months.  Suffice to say some medical issues have been keeping us on edge and eating has become a problem for my husband.  Hence the reason for the lack of posts as of late. 
This recipe I threw together in frustration actually turned out pretty well. It is easy, quick, and cheap (all good things.) Plus it has protein, carbs, and veg, all necessary for a low-blood sugar, moody, badly medicated husband. 

1 box of macaroni and cheese, any kind, I used white cheddar.
2 cans tuna, drained
1 cup frozen peas
1 12 oz. can cream of mushroom soup
Shredded cheddar cheese about 1 ½ cups
½ c. milk
1 tsp. onion powder
½ c chopped onion
Salt and pepper

Preheat oven to 375.
Boil noodles together in a pot until al dente (just tender) drain and set aside.
In a large bowl, stir together cheese packet, milk, soup, tuna, onions, onion powder, salt and pepper to taste, and peas.  Stir in noodles and pour into a baking dish. Cover the top with shredded cheese and bake for about 30 min until bubbly. Num nums.

Sorry for the short-ness of this post, I will follow it with a more lengthy one soon.

Ta.

Saturday, March 10, 2012

Kitchen Essentials


I thought I’d include a little article (she said, mooning over these items) about kitchen essentials I CAN NOT live without and why everyone should have them.

If you’re a home cook, especially a serious one, your gear can be the difference between fabulous and mediocre.  Now I’m not saying any of these things will necessarily make or break your meal, but everything helps.

Some people swear by silicone bakeware, or a certain brand of utensil, but, all things being equal, I find that if you do things right, it won’t matter if you’re using your grandmother’s eggbeater and tongs that don’t close anymore.

My first and most important can’t-live-without item is my chopper.  Now this thing, serious chef or not, will save your life. (one day maybe literally!) Wicked sharp, with a flat blade, flat cutting surface, and no serrations, this knife does everything but cut bread.  I use it seriously, several times each day. It is the most often reached for and, as a result, most often washed, item in my kitchen arsenal. It never leaves the counter.   Mine has a somewhat flexible blade, which I like, because I use it to scoop up chopped things, after I have chopped them, and transfer them to the pot or pan.  But if you prefer a standard, thick tang, go for it.  It can cut through soft tomatoes, and frozen meat alike.  Having a good knife makes your work SO much easier. I can’t even remember what my life was like before the chopper. (and some very thoughtful friends who got me my knives as a wedding gift.)

The second thing, though less glamorous-looking, are my kitchen shears.  Definitely the second most reached-for item in my kitch.  Cutting fresh herbs, opening packages, threatening my husband when he comes into my cooking space, all of these are great reason to have a pair of good heavy duty kitchen shears.  They will serve WAY more purposes than you can ever imagine. Not much to explain about them.  They do need to be scrubbed pretty well after you use them on food, as little bits tend to get stuck, especially if you are meat-cutting. (Don’t laugh, have you ever tried to de-bone chicken without kitchen shears?)  So get them. Or USE them if you have them and they are gathering dust in a drawer.

My third item that is more of a non-essential, but I could not survive without, is my wok. (shown here with shrimp-fried-rice and the other kitchen essential COFFEE!) Wok? you say? Yes, W-O-K, the big dishy metal pan that the Chinese so favor. These are a huge amount of applications for a wok besides chicken fried rice. I use mine for stir-frying, fajitas & tacos, deep-frying (yes), and a host of other genius plans.  Deep frying may be the most surprising, but most useful, item on my list.  We have been through three electric deep-fryers in the past couple years. None of them produced a satisfying crispiness and that golden brown color we all want on our fried foods.  Even the one that claimed to be ‘commercial grade’ was crap-ola.  We figured out that the oil simply wasn’t getting hot enough and staying that temperature, to sustain good frying.  So I began experimenting with a huge jug of oil and various pots and pans in my over-stuffed cabinets. The wok emerged the clear victor.  It seems to heat the oil more evenly without scorching it.  Its wide mouth gives the oil a lot of surface area when thingies begin to float, and its deep-ness lets them sink to the bottom until they are ready to float. The sloped sides also make it easier to skim things off the surface when done frying.  So, more often than not, our wok is filled with frying oil.  Stir-fries are a no-brainer, as are fajitas, which, after all, are latino stir-fries.  The key is, with this pan, to keep the food moving. It makes tossing food like a pro on TV, easy for uncoordinated me.  The other thing I use it for is boiling noodles.  No, not like spaghetti or macaroni, but big, cumbersome and troublesome noodles like manicotti, lasagna, and jumbo shells.  Again, the surface area and deep-ness come in handy and your noodles stick together and break less often.  I’m sure you can find many other uses for this wonder-pan.

Those three items. That’s my holy grail list of what I need to have around.  And all these things you can probably acquire for under 50$. How cool is that? 

There is one other item on my countertop that I find it hard to exist without.  But this one is a big-ticket item and you can certainly make do without it.  My stand mixer. Wooo baby, my life was so much easier the moment I brought her home, my beautiful, open-box-price KitchenAid.  She would have run me more than 200$ new, without all the add-ons and doo-dads.  Never underestimate department store open-box deals, hehehehehe.  But seriously, you can often find them at tag sales, yard sales, thrift stores.  People who don’t cook just don’t appreciate then and see them as heavy, bulky, and useless.  I’m here to tell you otherwise.  If you are a baker, ESPECIALLY if you like to make bread, Get One.  KitchenAid, MixMaster, Sears brand, whatever suits your fancy, they are life savers and time savers!! So for someone impatient and cheap like me, a goldmine of opportunity.  I’m not going to go on and on about the positive sides of owning a stand mixer.  Suffice to say that it is my go-to for dough of any kind, kneading needs, batters, meringues, any anything else that requires whipping, mixing, or kneading.    


So there you have it, a short list of my kitchen essentials and why I love them so.  Next up, new recipes!!

Fun with Puff Pastry


I have decided, this week, to experiment with frozen puff pastry, as I don’t have much experience with the stuff and it always looked so neat.  Making it from scratch is WAY complicated and takes forever and frankly, I don’t have the patience or time for all that folding, so I fake it. But if you want to try it, here's a link to another wonderful blog that gives detailed instructions on how to DIY.  I’m all about time saving and money saving so, why not?

A box of the stuff will run you about 3.50$ and you will get 2 sheets that are approximately 9”X12” or so.
For this epic fun, I used two boxes of pastry, 4 sheets. 


Turnovers


This is by far the easiest and, I daresay, the most impressive of the puff pastry fun.  If you are having company, these will make them think you spent HOURS in the kitchen makin them.

You need:
2 sheets of puff pastry
1 can of pie filling (cherry, apple, blueberry, whatever) (and yes I know ‘cheater! cheater!’ you can make the pie filling from scratch but the point of this is to save time and money, silly)
1 egg

Thaw the pastry according to the package directions until it is pliable.  Cut into 4 equal pieces. Place a HEAPING tablespoon on the center of each square.  Fold over on the diagonal, use a little bit of water and a finger to seal the edges. Cut a vent or two in the top to let steam out.  Flute edges with a fork, like I showed you with pie crust.  Brush with egg wash, sprinkle with sugar. Bake!!! Makes 8
That’s IT!  And let me tell you, they are both impressive AND delicious.

(photo courtesy Shutterstock)


Spinach Appetizers

1 sheet puff pastry
1 package frozen creamed spinach
A few small button mushrooms, chopped finely (or about half a small can of mushrooms)
1 clove minced garlic
2 artichoke hearts, chopped
Shredded mozzarella, cheddar, or, really any cheese
 A mini-muffin pan

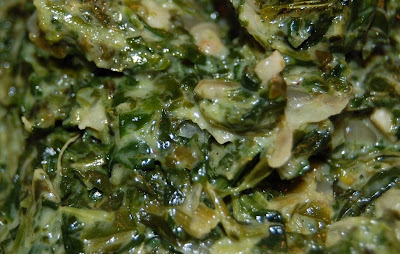
Again, thaw puff pastry according to package directions, cut into 12 equal pieces.  Cook creamed spinach also according to package directions, let it cool so that it is just warm, not scorching. (if you start the spinach when you take the pastry from the freezer, they should both be ready at the same time. Add garlic, mushroom, and artichoke to spinach and mix well. Press thawed squares of dough carefully into mini muffin holes. No need to grease pan, puff pastry contains lots of butter.  Place (carefully) a teaspoon or so of filling in each little pastry-lined cup.  Top with a pinch of shredded cheese.  Bake for about 20 minutes at 375 until the pastry is browned and the cheese is golden. Perfect little appetizers for fancy-pants people or just friends coming over to chat and chill.  Makes 12
 

Little Baked Crabbies

1 sheet puff pastry, thawed (duh)
1 block of cream cheese, softened
¼ cup green onions, chopped finely (about 2 onions)
1 small can of crab meat (I think they are 3 oz. but not sure)

Cut puff pastry into 8 equal squares.  Mix remaining ingredients in a bowl, mix well.  Place about 1 teaspoon of filling in the middle of each square.  Pinch corners together, forming a little bundle. Like this: ~~~>  
 Seal with water.  Bake at 375 for about 70 minutes on parchment-lined baking sheet or baking stone.  Makes 8

Note*** This filling mix is also what I use for crab Rangoon. Just do the same thing with wonton wrappers instead of puff pastry, and drop them in hot oil for about 30 seconds. Voila!!

Tuesday, February 28, 2012

Beef Hand Pies


In honor of the upcoming holiday, the green, the mean, St Patrick’s day, I’m going to do something that’s an homage to Irish/English/British/Scottish (whatever) food.  One of my favorite things to make from that region of the world is shepherd’s pie. It’s hot, homey, filling, comforting, and cheap!!!  This is my twist on that classic dish.  Small pastries filled with beefy and veggie-y goodness that you can eat like a hot pocket (though these are MUCH better). Little ones might even eat their veggies without a fuss if they have a fun handy pocket to eat them out of.  I believe that the Brits call these ‘pasties.’ Try it! Many Noms.

Beef Hand Pies
 
3 diced potatoes (about 2 c.)
1 c. minced parsnip or turnip or rutabaga
1 c. diced carrot (or pre-cut matchsticks)
1/2 medium onion, minced
¼ c. frozen peas
1/2 lb. chopped beef or steak, or chop steak, or ground beef, whatever you have, small bite size pieces please
1/4 tsp. garlic powder
4 slices cooked chopped bacon
1 tsp salt
1/2 tsp pepper (more if you like)
2 9" prepared pie crusts

Line a baking dish with foil. Combine ingredients and spread in dish. Cover with foil.
Bake at 350°F oven for 30 minutes, uncovering during the final 10 minutes.
Unroll one pie crust on a baking sheet. It helps to cover the baking sheet with parchment first, or use a baking stone if you have one (I <3 my stone).
Make 4 mounds of mixture on the pie crust, one for each pie quarter. Brush edges and inner sides of circle with water. Cover with second pie crust. Using a sharp knife, divide along an X in the center of the circle (see photo). 
You should now have 4 wedge shaped food-pockets, flute the edges with a fork or your finger to make sure they are good and sealed. You wouldn’t want all that good stuff leaking out!
Brush tops of pies with 1 beaten egg white if you want super shiny crust. Cut a couple of vent holes in the top crust.
Bake at 375°F until tops are golden brown (about 30 minutes).
Take that British Isles!! Njoy!!!
Much love ~Ashe

Wednesday, February 8, 2012

Post Super-Bowl Munchie Fest

Indianapolis was the center of the universe this past weekend.  It is strange how one game of football can inspire such subculture. People wait all year for this one football game to go all out, some even buying new tvs, couches, and grills to accommodate the event.  There are super bowl themed everythings; stores have superbowl sales and specials. And then there is the food. OH the food, there are party trays of finger foods, frozen appetizers, chicken wings of every variety, crackers and chips and marvelous dips, and cookies and cakes, meats and breads.  There are even cookbooks written specifically for "game day" cooking, (and marketed towards men.)  It is a sub culture of excess and indulgence, where sitting on the couch with your buddies and gnawing on wings and swilling beer is encouraged. Iiiiiiiiinteresting. 

I certainly have nothing against wings and beer.  In point of face, they are one of my favorite things to munch when watching certain things (stanley cup). But wings have been done to death and until I find a really extraordinary new way to do wings, you will not see them on this blog. So I was going to post the recipe I made for the super bowl party I attended, but it didn't seem to get many rave reviews.  Since I strive only to post the BEST recipes I try, this one, for Hawaiian meatballs, is going on the chopping block.  If anyone wants it, I will oblige. There are, however, many other bite sized yummies in my repertoire, and I think that in honor of all the sports-themed gatherings we are a part of as Americans in the 21st century, it would be an appropriate avenue to explore.
So here goes with the first one, and one of my all time favorites:

Veggie Pizza

1 can store-bought crescent rolls
1 8 oz. block of cream cheese, softened to room temperature
assorted veggies diced (i use broccoli, carrots, peppers, cauliflower, and black olives, but use whatever you fancy, just as long as they are good RAW)
1/2 tsp dill
2 cloves of garlic, minced or pressed
chopped fresh parsley (optional)


Preheat the oven according to package instructions on the rolls.
Unroll the dough in one long piece, do not separate at perforations, and place on a baking sheet or jelly roll pan.  Bake for approx. 10 min, until just golden brown, do not over bake. Remove from oven and let cool completely.
Meanwhile, mix cream cheese with dill and garlic, and chop veggies, I usually go by 1/2 inch or less bits with this dish and you will see why.
When dough is cool, spread an even layer of cream cheese over the surface, go all the way to the edges.
cover the cream cheese mixture with all the chopped veggies, laying them on as thick or thin as you want, press to assure they stick. Cut the pizza into bite size squares and serve, (this is why the veggies must be cut small, you want a little bit of everything on each piece.) This can be eater either at room temp or chilled in the fridge for an hour or so.  Either way, its great. Simple, delicious, vegetarian, and yes, even a bit healthier than some of those deep fried game day snacks.


Herb and Garlic Beef Pinwheels

This recipe again uses my old favorite stand-by, the store bought crescent roll. I use these little buggers for more things than just serving alongside the mashed potatoes and gravy.  They are very versatile, especially when it comes to appetizers.  They are inexpensive, last a long time in the fridge, and can be filled with all sorts of yummy things to make them more interesting (i admit that alone, they are rather dull).  Wrap one around a half a hot dog and you have pigs in a blanket, roll one up with a bit of shredded mozzarella and pepperoni, brush with garlic butter and you've got a pizza roll (ooo, I'll have to make that one tonight!). These are a touch more sophisticated than the kid friendly munch mentioned above, and are just as, if not more delicious. 

Herb and Garlic Beef Pinwheels

1 can store-bought crescent rolls
1 small  onion, chopped
3 cloves garlic, minced
1/2 lb deli roast beef, cut into thin strips
1 tsp basil
1/4 tsp black pepper
1/2 tsp thyme
pinch of salt
1 Tbsp EVOO (extra virgin olive oil)
sesame seeds (optional)

Preheat oven to 375
Heat olive oil in a small skillet over medium heat
Add onion and garlic and cook for 3 to 4 min, stirring occasionally until onion os soft.  Remove from heat.  Add beef, basil, thyme, pepper, salt, and toss to mix well, set aside.
Unroll crescent dough and separate into two rectangles, press perforations together as best you can and flatten dough.  Spread each rectangle with half of the beef mixture.  Starting at the short side, roll up both pieces, pinching the edges to seal shut.
You will be slicing the logs into 1/2 inch slices but I find this is easier to do after I have thrown them in the freezer for 15 -20 minutes.  Use a serrated knife and saw gently, you can reshape them on the baking sheet if you need to.  Place on baking sheet once they have been cut and sprinkle with toasted sesame seed.  Bake 13 - 18 minutes, or until golden brown.  Serve warm.